Pages

Tuesday, June 4, 2013

The Best Vanilla Cake EVER!

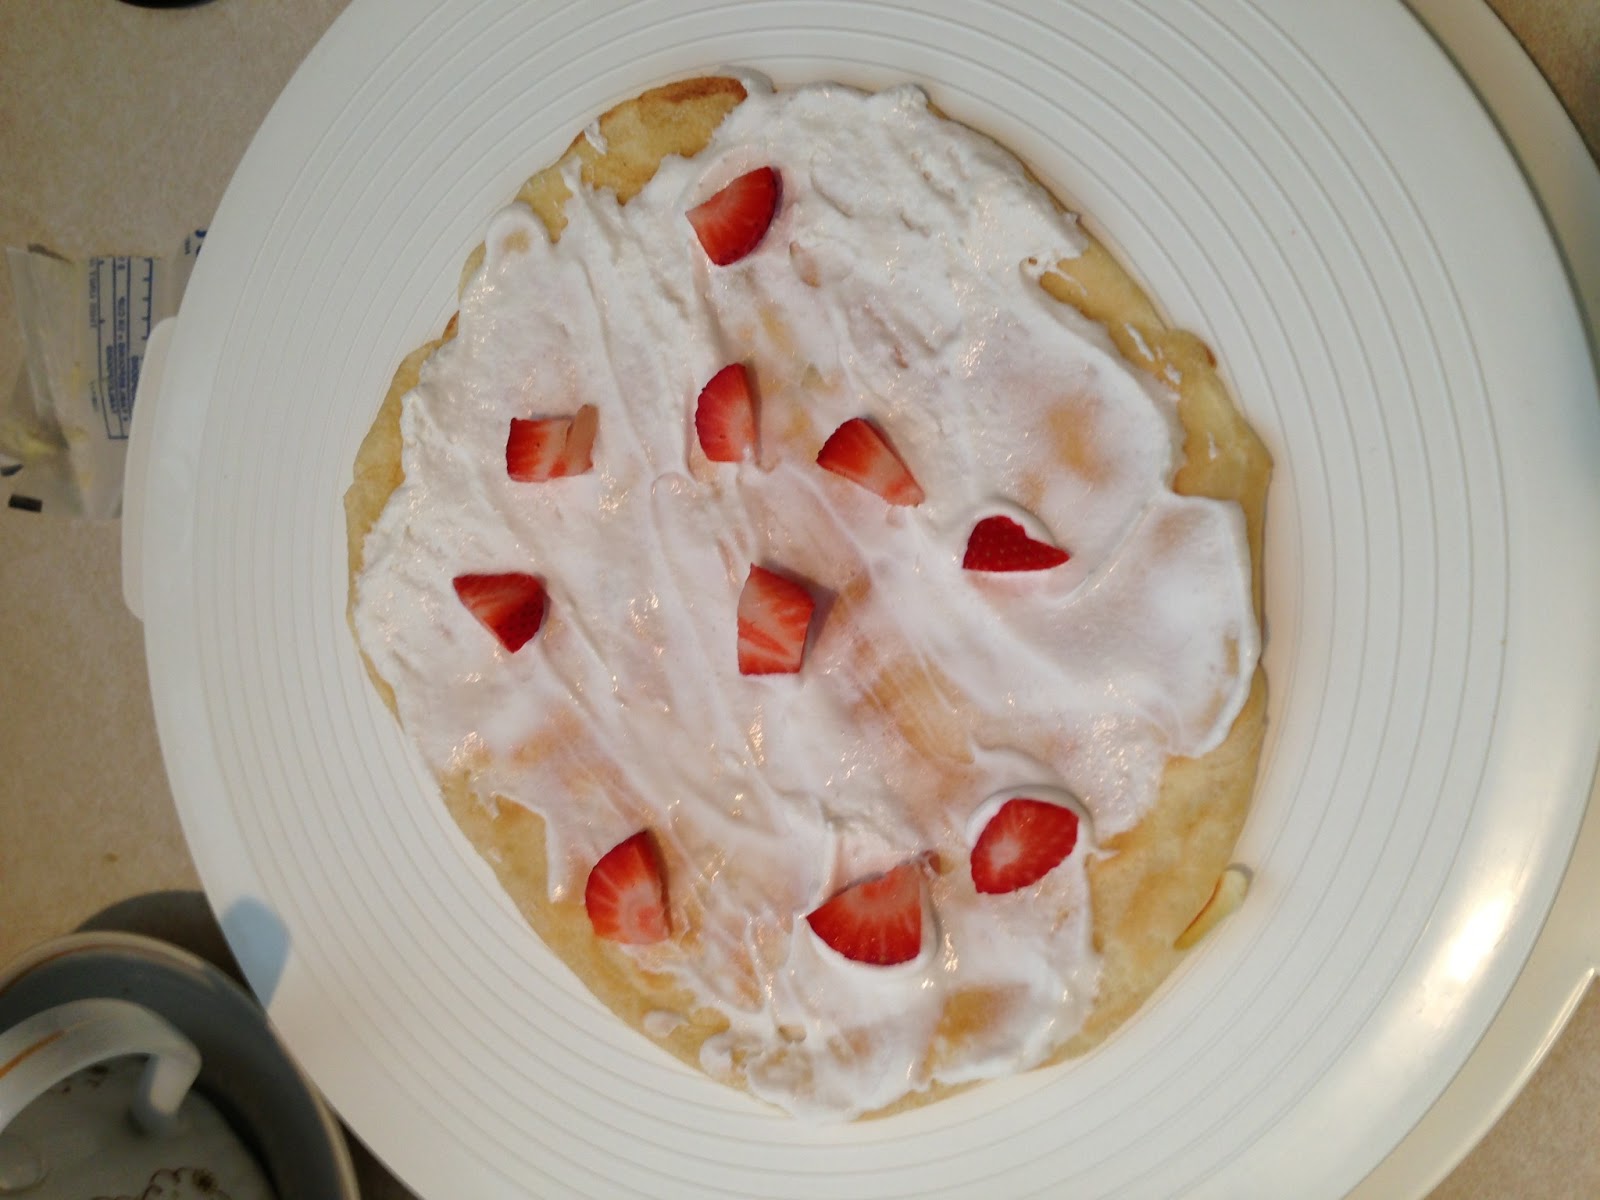
This cake is seriously the most awesome vanilla cake I have ever had. I have made various vanilla cupcake recipes and been so disappointed in the past. I made this cake and froze it for almost 6 months. When I defrosted the cake and assembled the strawberries and cool whip filling it looked (AND TASTED!) like I spent the whole afternoon making it! This is a full proof recipe that I swear by! It lasts well in the fridge but definitely tastes the best if eaten the same day/ next day.


Vanilla Cake
Yields: One 2-layer, 8-inch round cake

GATHER:

5 large egg whites, at room temperature
1 whole egg
1 cup whole milk, at room temperature
2-1/4 tsp pure vanilla extract
3 cups cake flour, sifted 2
2 cups sugar
1 tbsp + 1 tsp baking powder
3/4 tsp salt
12 tbsp unsalted butter, cold and cut into 24 even pieces

TO DO:

1. Preheat oven to 350°F (180°C). Grease, line with parchment, and flour two round 8-inch pans.
2. In a medium bowl combine and stir the egg whites, whole egg, 1/4 cup of milk, and the vanilla. Set aside.
3. In the bowl of an electric mixer fitted with the paddle attachment, combine the dry ingredients together on low speed for around 30 seconds.
4. Add the butter one piece at a time, about every 10 seconds. Continue to mix on low until the mixture is a fine crumbly texture. 
5. Add milk, and mix on low speed until just moistened. Increase to medium speed and mix for 3 minutes. 
6. Scrape the sides of the bowl and begin to add the egg mixture in 3 separate batches; beat on medium speed for 20 seconds after each addition. Fold once or twice to ensure the batter at bottom of bowl is incorporated.
7. Divide the batter in two, spreading it evenly with a small offset palette knife.
8. Bake until a cake tester comes out with a few crumbs when inserted into the center, about 30 minutes. Be careful to not over-bake. Check cake at 20 minutes, but not before, and then set the timer for 5 minute intervals. Let cool on racks for 10 minutes before loosening the sides with a small metal spatula, and invert onto greased wire racks. Gently turn cakes back up, so the tops are up and cool completely.
9. Wrap tightly and store at room temperature for up to 2 days, refrigerator for up to 5 days, or frozen for up to 6 months. Best eaten the same day as baked as I noted above.

Pair with your favorite chocolate or vanilla icing. You can also make different fruit fillings or fold strawberries in cool whip and have a simple cake.

Chocolate Covered Coconut Truffles

This is dedicated to a fellow blogger who asked me for this recipe many months ago when I made these for my mom for Mothers Day! These are really really simple and taste so absolutely amazing!

Chocolate Covered Coconut Truffles


GATHER:

3 cups sweetened, shredded coconut

1/2 cup powdered sugar

1/2 cup sweetened condensed milk

1/4 cup coconut oil, melted in microwave for a few seconds

1 1/2 cups dark chocolate, melted (I used Lindt special dark chocolate bar ) 

TO DO:

1. In a large bowl, combined coconut and sugar and mix to combine. 
2. Add in milk and coconut oil, mix constantly until a gooey coconut filling results. 
3. Roll between the palm of your hands into teaspoon-sized (or a little larger) balls and place on a parchment-lined baking sheet. 
4. Freeze for 15 minutes, then remove from freeze and roll again between your palms to smooth any coconut edges. 
5. Freeze for 10-15 minutes more. 
6. While freezing, melt chocolate chips in a double boiler or microwave. Remove coconut balls from freezer and immediately dip.


Refrigerate until ready to serve – at least 15 minutes.

From Scratch Quiche

Hello all!
It has been quite some time and I have to apologize! I was working full time for some weeks since my co-worker had a baby. I don't want to get too behind on my posts so I will try and play catch up now by posting a few recipes I was able master while having a busy full time schedule. I have to mention that I give props to the full time working mothers. I now know why so many families end up eating quick ready made or easy boxed dinners. There is little time at the end of the day and many parents take their kids to lessons and activities. It was a little hard for myself and I only have a husband to care for!!! I have learned now why so many people want crock pot meals and fast, easy recipes with simple ingredients found at home.

My husband and I both love quiche. This recipe is completely from scratch. I will not tell you what exact filling to put into it because in my opinion there is many different varieties that you can do. In my kitchen, I pretty much put a combination of things that I have left over into a frying pan and that's how I get my filling. Of course there are the standard and most common quiches but these are the mixtures I suggest that work well together:

1. Spinach
2. Lorraine (bacon filling)
3. Ham and Swiss
4. Broccoli and Cheddar
5. Mushroom Asparagus
6. Peppers and Onions (and even some mushrooms)

Please comment any other suggestions. Remember that the flavors and the cheese have to go together. If you want a quiche with a lot of filling then use closer to 2 cups of veggies/meat; however, if you want a light quiche only use a cup of broccoli or mushrooms or whatever you are using)


FOOL PROOF QUICHE FROM SCRATCH

What You Need:

Ingredients

1 9-inch pie crust (recipe below or just by Pillsbury)
1-2 cups filling ingredients, such as broccoli and bacon or mushrooms and caramelized onions
1-2 cups (3 oz - 6 oz) grated cheese, like Gruyere, Swiss, or Cheddar
3 large eggs
1 cup milk
1/2 cup cream (heavy, whipping, light or half-and-half works)
1 tsp salt
1 tsp garlic
1 tsp basil (dried) or thyme (dried)

Equipment

9-inch straight sided glass pie dish or a tart pan
Food Processor if you are making homemade crust

What to do:

1. Preheat oven to 350°F. Prepare your crust by using the recipe at the bottom of this post or use a pre-made crust and move to step 2.

2. Prepare the Filling: While the crust is baking, prepare your quiche filling. Make sure all ingredients are cooked through and fairly dry. (If making filling with bacon make sure majority of grease is removed or else your quiche will be very oily)

3. Remove the pie crust from the oven after 10 minutes.

4. Start Assembling the Quiche Filling: Sprinkle half the cheese over the bottom of the pie crust and top with the fillings. Sprinkle the remaining cheese over top.


4. Prepare the Custard Filling: Whisk together the eggs, milk, cream, salt, garlic and basil or thyme until frothy. Pour the custard into the pie crust.

5. Bake the Quiche: Bake the quiche at 350°F for 30 to 40 minutes, until the edges are set but the quiche still jiggles a little in the center. Cool for at least 20 minutes before eating or chill overnight and reheat next day in microwave for around 10 minutes or in a 300°F oven until just warm to the touch.

ENJOY!


HOMEMADE CRUST USING A FOOD PROCESSOR

2 cups flour (I have been doing 1 cup unbleached flour with 1 cup whole wheat)
9 tablespoons cold unsalted butter, diced
1/2 teaspoon salt
1 egg, lightly beaten
2 tablespoons cold water

In a bowl of a food processor fitted with the steel blade, place flour, salt, and butter. Pulse until you get coarse pea-size crumbs. Add egg and 2 tablespoons of water. Pulse until a moistened crumbs form. If the flour mixture still looks dry and doesn’t form into a ball, add another tablespoon of water and pulse a little more.

Take the dough out of the bowl and dump into a well-greased (tart) pan. 


With your fingers, work the dough around the edges and the bottom of the pan, spreading it evenly. Bake for 10 minutes at 350°F

Tuesday, March 26, 2013

Chocolate Drizzled Strawberry Crepe Cake

Good Afternoon!
Sorry everyone. I completely fell off the face of blogger world.
I been busy with lots of things and really wasn't in the mood to take pictures and measure ingredients.
But I am back with a GREAT collection of recipes.
I will start with this one that I literally just put in the fridge. I promise you I still have chocolate on the corners of my mouth. I bought two crates of strawberries last week. I made a vanilla cake with whipped cream and strawberry topping and it was a huge hit amongst my extended family. I got a little tired of it though after eating it every day for 5 days! It really did keep fresh that long, since I kept it in the fridge. I will share that with you soon. But today, I wanted to use up the other crate of strawberries so I made a crepe cake with whipped cream and strawberry filling, drizzled with melted chocolate. Here is what I did:

Chocolate Drizzled Strawberry Crepe Cake


GATHER:

crepes:
1 cup flour
2 organic eggs
1/2 cup whole milk
1/2 cup water
1/4 tsp salt
2 tbsp. melted butter, slightly cooled

strawberries:
1 carton of hulled, chopped strawberries— def: removing the green stem or calyx from the top of the berry

cool whip:
go to store and buy 1 eight oz container =)

chocolate sauce:
1/4 cup of dark chocolate morsels

TO DO:

1. In a medium size mixing bowl, whisk together flour and eggs.
2. Add in milk and water. (It will be a little think and some clumps)
3. Add salt and melted butter. Beat until smooth. If it is too thick add another tbsp. milk or water.
4. Heat a non-stick pan or griddle on medium heat and spray lightly with PAM.
5. Using a 1/4 measuring cup, scoop the batter into the pan WHILE tilting it in a circular motion so the batter is THIN and coating the bottom evenly.
6. Cook crepe about 2 minutes, until you see small bubbles and the edges to curl up. You will notice the bottom in browned, then flip with fingers or a spatula.


7. Put aside on a plate.
8. Repeat until all the batter is used up.
9. Hull your strawberries and dice/chop into small pieces. 
10. In a medium bowl, fold strawberries into the cool whip.

ASSEMBLE:

1. On a large serving plate, place one crepe down in center.
2. Using the back of a spoon, spread evenly some of the cool whip and strawberries.


3. Cover with next crepe and repeat 1 and 2 until your out of crepes.
4. Melt the chocolate morsels in small bowl: 1 1/2 minutes in microwave. stir and heat another 1 1/2 minutes until smooth.


5. Using a spatula or spoon, drizzle chocolate over the crepe cake.

ENJOY!


Monday, February 11, 2013

Oven Roasted Parmesan and Paprika Potatoes


So, tonight we are having corned beef. Let's go into a little story, which may be funny to some of you, but shows how God blesses us in small ways that we over look so many times during our daily routines. I saw a recipe for corned beef Soup on Pinterest a few weeks ago, so naturally when I went to the supermarket I went looking for it. I couldn't find it anywhere...I guess St. Patty's day wasn't close enough yet. I was a little sad, but got over it and moved on with a small sigh. My family knows that I can eat a whole pound of corned beef myself. I love it for some very strange reason. Growing up, I wasn't ever crazy about it; In fact, I think I hated going to Grandma's house when she was going to serve it. Then one year, I guess my taste buds just finally woke up and realized what they were missing! Anyway, so my cousin by marriage came from across the big US-of-A and brought us some goods, in which was such a huge blessing to our family. One in which was the corned beef! I was more excited about that then the huge box of potatoes that will save us a hunk of money on grocery bill this next month or two. In our household the following are stables in the cabinets and fridge: Onions, Carrots, Peppers, cucumbers, CABBAGE, POTATOES, mushrooms, dill and parsley and tomatoes. I feel like I am always running to the store for one or more of them even though I literally just bought them. God blessed us so much this week and I am so incredibly grateful!


Okay, enough of the story about the Corned Beef and moving on to the recipe:


GATHER:

6-7 medium potatoes (Use Redskin and leave skin on or Russet & peel and wash)
ice cold water
1 Tsp salt


3 Tbsp extra virgin olive oil
3 Tbsp Parmesan cheese (Freshly grated or Kraft kind)
1 Tsp Kosher salt
1/2 tsp black pepper
1/2 Tsp garlic powder
1 tsp paprika

TO DO:

1. Wash and peel your potatoes (unless your leaving skin on)
2. Place a potato on the cutting board and cut it lengthwise to get three slices.


3. Cut each slice into three strips, they should all be about the same height and width.


4. Place strips into a large bowl and fill up with ice water and 1 tsp salt. Place in fridge for 20 minutes-1 hour. Martha Stewart claims "The secret to awesome oven fries is pre-soaking them in salted water, which makes the potatoes release a bunch of their moisture before cooking. This ensures they will crisp up without having to risk burning them."


5. Dump out water and lay on a towel; pat dry. Clean bowl and wipe dry. Place potatoes back into the bowl.


6. Combine all the ingredients for the rub, except potatoes, water and salt, in a small bowl.


7. Pour mixture over the potatoes and mix until evenly coated.


8. Place potatoes on a well greased (you can use PAM) aluminum pan and bake for 40 minutes at 400 degrees F. Turn potatoes over and bake another 15-20 minutes.


9. Serve warm with mayo, ketchup or whatever you fancy =)


ENJOY!!

Apfelkuchen mit Streuseln
German Apple Cake with Streusel 

I grew up with amazing German grandparents that lived a 5 minute car-ride from our house. When I finally got old enough to ride my bike across the highway and to their place, we moved. Well, its not THAT sad...we moved 5 miles away onto a very tiny farm. There are many, many great meals that we have shared over the years at my Grandparents house (bei meine Oma und Opa hause)


I always asked my Oma for recipes, some in which she was delighted to share and others she refused. My favorite apple cake, she really won't share! That's okay though, I always appreciate going over to her house and having this special treat. Now that I am a married woman, I decided to attempt finding a recipe that would match my grandmothers cake. I came up with the idea to look at pictures on google images to see what one looked moist, beautiful and delicious. Sadly, there weren't any that made my mouth water, until I came across Greenderella.com. Her recipe is all in metric system, so I had to go out and perchase a scale. She also used soy milk, wheat flour, and corn starch. I decided to modify it to my own liking and this is the recipe that I have come up with. I have done 5 trial runs, in which 4 came out amazing. What happened with one of these trials you may ask? Well, I got a little to confident in making this gorgeous cake and didn't put a toothpick in the center to see if it was done after the suggested 40 minutes that Greenderella.com states it takes to bake, so the cake was a wet mess in the center. Thank Heaven's we did not have guests coming over. I was heartbroken and learned my lesson!

Enough chatter, here is the recipe!


GATHER:

Batter:

1 stick of butter, softened slightly
2/3 cups white sugar
1 packet vanilla sugar (Dr. Oetker....withouth this don't attempt cake)
2 eggs
pinch o' salt
4 drops of lemon aroma (or fresh lemon juice)
2 cups flour
1/2 cup of cornstarch (I sometimes just use extra 1/2 cup flour if I don't have cornstarch)
2 tsp baking powder
4 tbsp milk
3 medium apples, sliced thin and kept together to fan out on top of batter

Struesel:

1 cup flour
1/2 cup white or brown sugar (I have done both, I prefer with brown though)
1 packet vanilla sugar (Dr. Oetker)
1 stick of butter, softened


TO DO:

1. Preheat oven to 350 degrees F.
2. Cream butter, sugar and vanilla sugar.

(Quick picture to show you what to look for in supermarket. I got mine at Russian market, I have seen it at German markets and Spanish markets that carry European things as well.)

3. Add in eggs, one at a time.
4. Add salt, lemon aroma, flour, baking powder and cornstarch. The batter will be quite thick and dry.
5. Add milk.
6. Cut your apples, keeping them together to fan out over the batter.


7. Grease a 10 inch spring form pan, smooth the batter onto the bottom so it is even. It will not be a thick layer, don't worry once all the layers are put together you'll be happy its not.


8. Fan out your apples over the batter.


9. Make struesel: Combine flour, sugar, vanilla sugar together in a small bowl. Cut up the butter into small pieces and add to mixture. 


10. Combine with your hands so you have a coarse crumble.


10. Top the apples with the struesel.
11. Bake for 1 hour, check with a tooth pick and continue to bake until done. (Mine took almost 1 and 1/2 hours but it is worth it.


Wednesday, February 6, 2013

Mashed Potato Croquettes


Last night we had Polish kielbasi with onions and peppers for dinner and mashed potatoes to go with. The mashed potatoes got left out and smelled kinda funky in the morning. I know they didn't go bad but they wouldn't taste the greatest if we just heated them up in the microwave. I had the idea to make my mom's potato pancakes for dinner this week, but really don't feel like grating a bunch of potatoes and onions. So, I thought I would take the liberty to just make 'mashed potato pancakes'. Well, obviously there will be a little different technique to make them because you cannot just throw them in a ton of oil or else they will get all mushy and weird.  How do I know this? Well, I tried to make these when I worked at a quaint little bistro for a year and the mashed potato pancakes turned out miserable when I attempted to basically deep fry these puppies. This time, I decided to just use my handy-dandy non-stick pan and a small amount of veggie oil. Here is the recipe...These are delicate tasting and seem like little pillows that melt in your mouth! I really think these are better than just regular mashed potatoes. Of coarse there are way more carbs, but whatever! Enjoy!

Gather:

6 cups of mashed potatoes, chilled (that already have butter, milk, sour cream, salt and pepper)
1/2 cup of Kraft Parmesan cheese
2 eggs
6 Tbsp flour + 4 Tbsp to coat before frying
2 green onions, chopped
handful of chopped parsley.
Vegetable oil or Canola oil for frying

Steps:

1. In a large bowl, combine the chilled mashed potatoes, Parmesan cheese, eggs, 6 Tbsp of flour, chopped green onions and parsley.


2. Using your hands (if you have latex gloves you can put them on to protect your manicure!) mix all the ingredients together until even and smooth. (I had a few lumps in mine and worked out fine)
3. In a small bowl add 4 Tbsp of flour and season with salt and pepper (I used Jane's Crazy Mixed Up Salt from SR)
4. Using a wooden spoon, scoop out some of the mixture and place in your palm. Flatten them out to make a nice circle. Place them on a baking sheet.


5. Now, one by one, coat them with flour and place into a pre-heated, oiled, non-stick pan.


6. Cook on medium heat until both side are golden brown. In between each batch you will need to add more oil. Just remember, it is a non-stick pan so you only need about a Tbsp of oil each time.


7. Serve warm with sour cream. Note: You can make these ahead, and put them back on the baking sheet and warm them up for 10 minutes on 350 when the rest of your meal is finished!


Tuesday, February 5, 2013

Oatmeal Pancakes

Since Saturday I have been wanting pancakes!! I think this idea may be linked to me cleaning out the fridge and finding syrup hiding in the back while also buying Bisquick this past week. We were almost out of milk and I feel bad that my husband doesn't have any of his favorite cereals in the house, so I thought I would try to make pancakes. I knew I wouldn't be mentally able to get up early enough in the morning to make him pancakes so if I made just regular ones they most likely wouldn't taste good the next day. So, I thought of trying this out. I love oatmeal sooooo much that I used to eat it EVERY single week day for over a year. I finally grew sick of it! (same goes for strawberry Nutrigrain bars.) These pancakes will be a little dense so you can make them the night before and just pop them in the micro for like 30 seconds then put on some maple syrup and they taste just like they came out of the pan! I think the dense texture prevents them from getting all soggy and weird! 

Please try the recipe and let me know what you all think!

Liebe,

TyLeigh<3 


1 cup Bisquick
1 cup of quick cook oats
1/2 tsp vanilla
3/4 cup of buttermilk
1 egg

1. Mix Bisqucik and oats together in a medium bowl
2. Add vanilla, egg and buttermilk. ( I made 1 cup butter milk by adding 1 Tbsp. vinegar and then filling the milk up to the 1 cup line) 


3. Once smooth, heat a medium skillet with a Tbsp. of butter and tsp of olive oil.
4. When butter begins to bubble, using a 1/4 cup scoop out the batter into circles onto the hot skillet.


5. Once bubbles begin to show on the tops of the pancakes, flip them over and cook for around 2-3 minutes or until brown.


6. Turn your heat down so the butter left in the empty skillet does not burn. If the skillet looks dry, add more butter and/or oil and repeat with the rest of the batter.
7. Eat warm with syrup or top with strawberries, blueberries or bananas! 


(Please ignore the horrible paint job on my fingernails. I don't paint my nails until the end of the night when I am done all my kitchen and household duties...they just get chipped anyway!)

Thursday, January 31, 2013

Cream Cheese Chicken Roll-Ups

Good Evening! I am sitting here waiting for one of our fellow young married couples to come over so I decided to share with you what I decided to make tonight for dinner. I wanted chicken last night, but I did not get home from the office until 8 pm so I had a big bowl of sausage and cabbage soup (which is sooooo simple, light and delicious!) and pan fried potatoes.

My good friend Lisa invited me for dinner a few months ago and made these crazy amazing chicken "roll-ups", I like to call it, not sure if that's actually the technical term or not. I texted her and asked what she put in them and she stated it was mozzarella, cream cheese, garlic and some cream cheese then top with breadcrumbs and bake it for 20-30 minutes. So I looked on Pinterest and Google and couldn't find any good recipe that had the ingredients I had. So I decided not to waste any more time and get to the kitchen since my hubby would be coming home in like 20 minutes.

Here is what I came up with...

Gather:

1/2 green pepper
1/2 red pepper
1/2 onion
1 Tsp olive oil

3 or 4 chicken breast (3 will yield 6 roll-ups, 4 will yield 8 roll-ups)

4 oz. cream cheese
breadcrumbs at your discretion

1. Saute peppers and onions in the olive oil on medium-low heat until onions 
are transparent and the veggies are starting brown.


2. Turn off the heat and transfer to a small bowl. Wait a few minutes and then add 4 oz cream cheese (or more if you like your chicken more creamy. This was the perfect amount for my husband and my taste.)


3. Cut the chicken breast in half horizontally to make thinner.
(On left is the full size chicken breast, right is the already cut breast.)


4. Place a heaping spoon of filling onto each piece of chicken, roll up and finish it off with a toothpick.


5. Place on a sheet pan covered with aluminum foil (to save time on clean up) and sprinkle bread crumbs
over each of the chicken roll-ups.


6. Bake 350 degrees F for 20-25 minutes.


Smachnoho!

Love,
Ty Leigh <3